Home Theater: Automating PowerRise
|
Yes, you can automate Hunter Douglas PowerRise blinds!
The best choice for affordable, motorized shades is Hunter Douglas. Their PowerRise system is powerful, reasonably quiet, and compared to Lutron QED or similar systems, exceptionally affordable. Unfortunately, Hunter Douglas has not made it easy to control the basic PowerRise Platinum battery powered shades via a home automation system. They support automation on their hardwired units, but these are much more spendy and not well suited for retrofit installations. Thankfully, there is a cheap and easy way around this: I hacked open a PowerRise remote control and interfaced it's buttons with an AMX REL-8 relay board. Every decent home automation system has the ability to actuate relays, and since PowerRise Platinum systems communicate via RF when "grouping" shades, you won't even have to attach IR emitters or maintain line of sight with the remote. This also covers any worries you might have about voiding the warranty on your shades - you'll only void the warranty on a single, cheap remote. |
|
Buy an extra PowerRise remote and take it apart. There are no screws; these things are "press fit" together. Using a small flat head screwdriver, pry the remote in half. I found it easiest to start near the front next to the IR emitter. You're going to tear the plastic up a bit - don't worry about it, as you're going to discard it when you're done. Do be careful not to damage the board or it's components when prying the shell apart. Retain the lower plastic piece with the battery cover for now; it makes a nice base to hold the board while soldering to the buttons. These remotes use those obnoxious rubber buttons and you can't solder directly to the button grid. Thankfully, there is copper underneath. Use your screwdriver to carefully scrape the black surface off some of the contacts. If you follow the traces on the board, you'll see that you need only 6 wires to actuate the 7 buttons. You can see the 6 you'll need in the image below. |

|
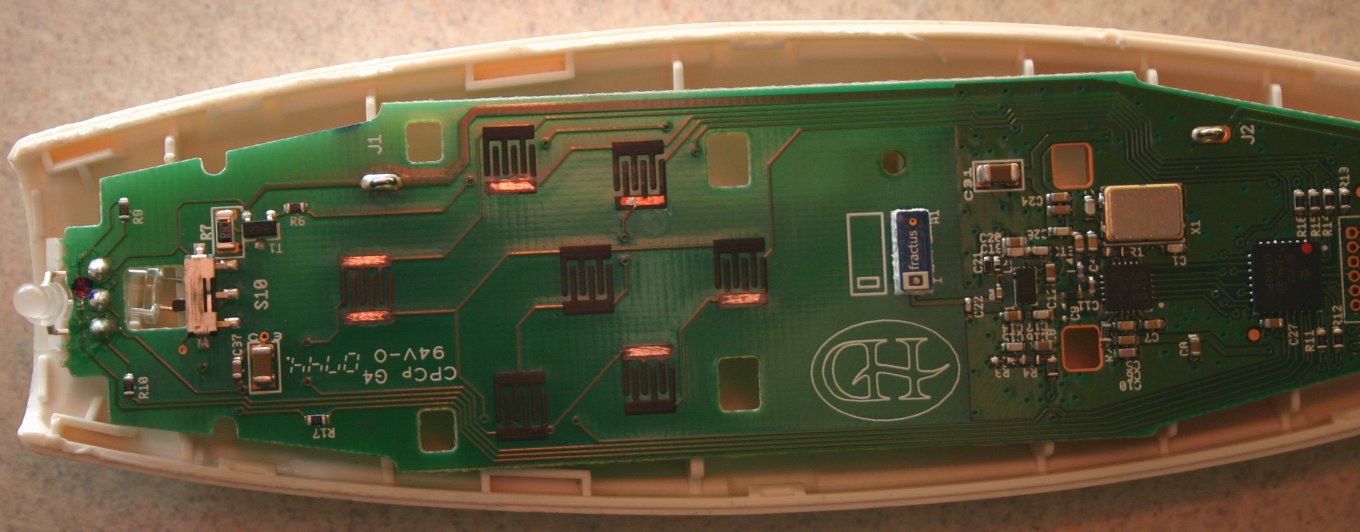 (click image to enlarge) Solder six wires to the six copper spots on the board. Be careful not to overdo either the solder, the heat or the copper on the end of your wires: The black portion of the button grids are conductive so if you glob too much solder on, things won't work. 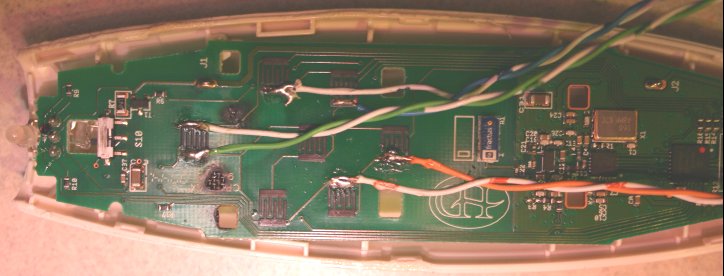
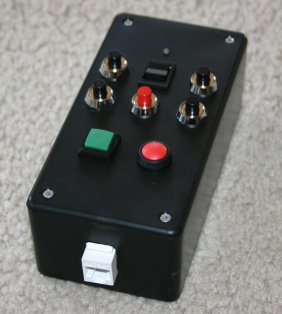
There are a couple of burn marks on my board; I was soldering with a newly purchased butane powered iron that, as it turns out, exhausted substantial heat out a port on the side near the tip. Whoops. I took that piece of garbage back to the store (total time of ownership: 30 minutes) and finished up with my electric iron. Thankfully, no damage was done to the electronics on the board. Now flip the board over. De-solder the battery terminals and connect a small 2xAAA battery box to them. Solder a pair of leads to each of the program and reset buttons, as shown in the image below. 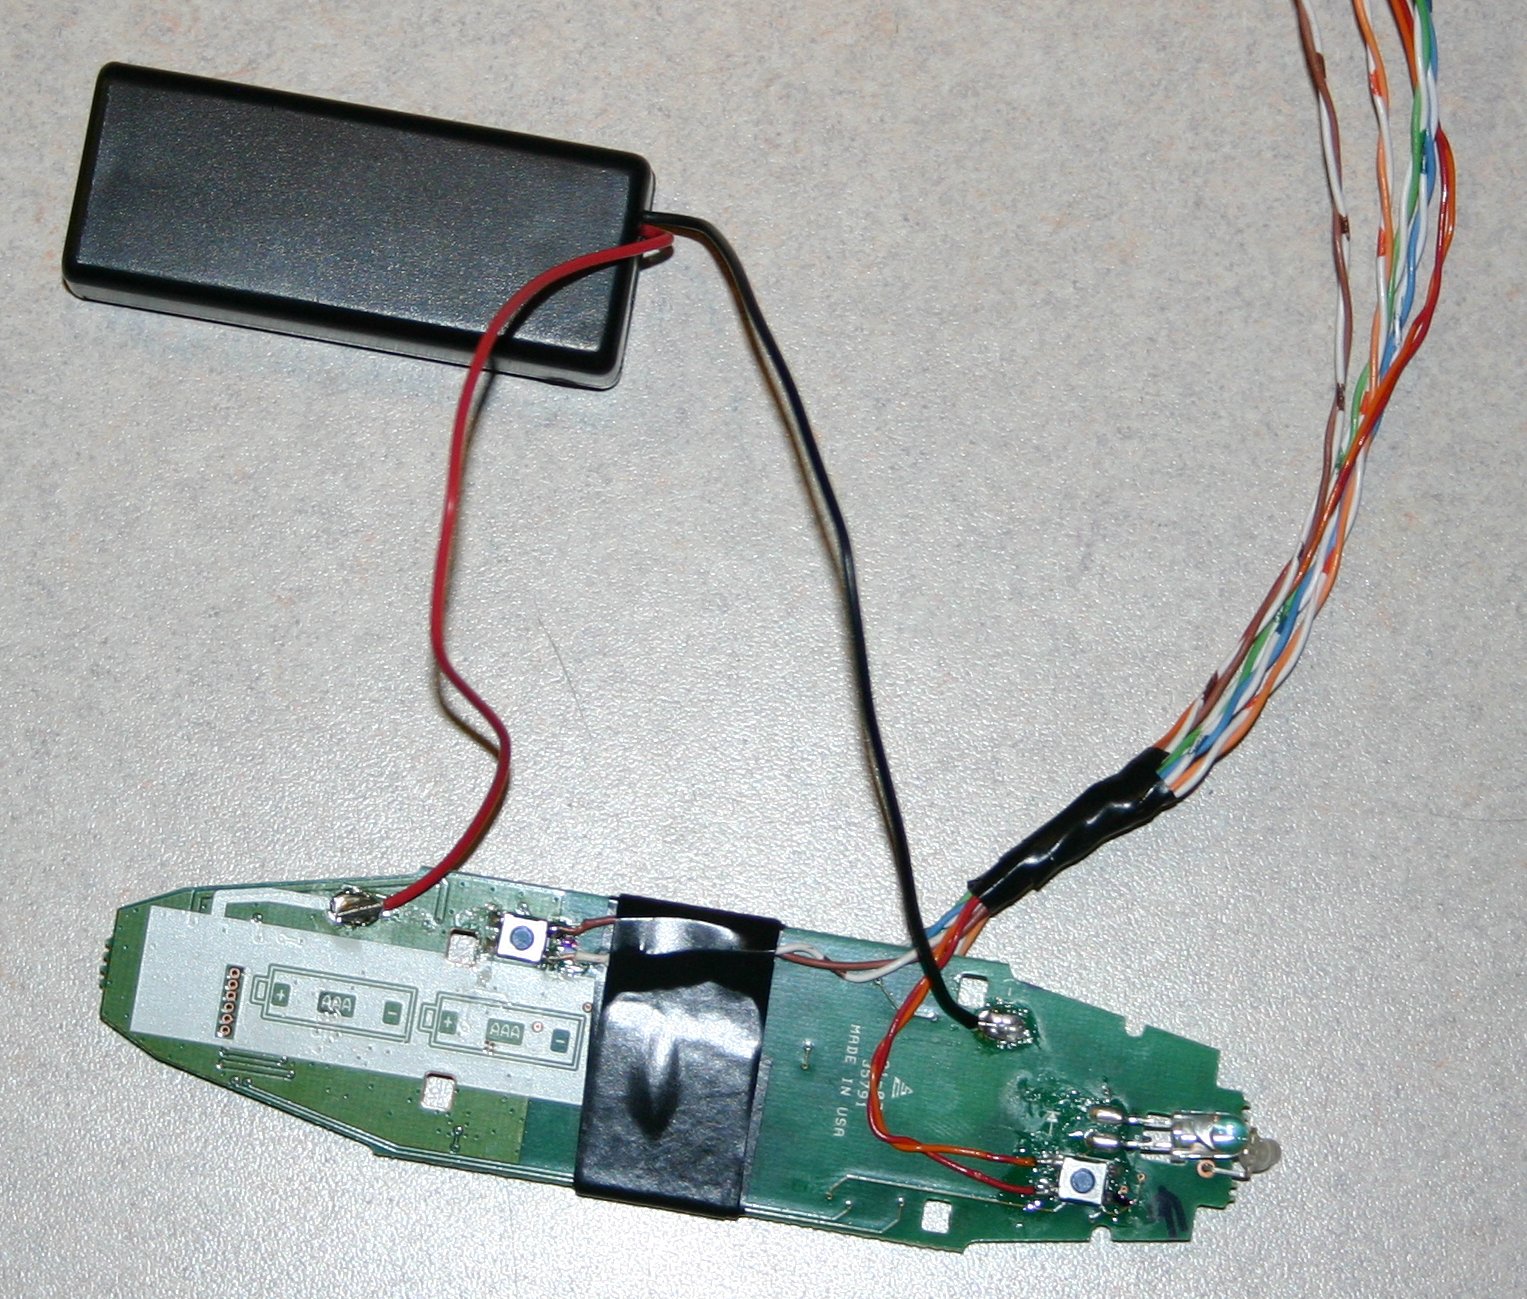 (click image to enlarge) You will also need to de-solder and use wires to extend the leads on your IR emitter and status LED. Now, strictly speaking, you could leave the board as-is and connect your wires directly to relays on your home automation system. However, the group functions in the remote need to be programmed for RF use. Since this is done via infrared and since you can't re-use those rubber buttons anymore, you really ought to connect these leads to proper buttons and put it all in a nice little project box. With a quick-disconnect for the HA system (I used a standard RJ-45 jack), you can then program or re-program the remote at will. Technically you could program the remote at this point by touching the right wires together and holding the entire contraption up to the right shades, but I suspect you'll quickly become frustrated with this effort. Here is the lid of my standard, Radio Shack project box: 
As you can see I've laid the buttons out in similar fashion as the original remote. Up/down in the center with the LED above it, group buttons around it & a red "group all" button. The green square button is "program" and the round red one next to it is "reset". I have an RJ-45 jack on the back of the remote for connection to my AMX automation system and the IR emitter is on the front. I've put some electrical tape around the IR emitter to help confine the IR beam; it made it easier to program individual shades without triggering the ones next to them. I used a dremel to make the holes in the project box lid. Underneath the lid is the initial wiring, pre-solder: 
Writing a step-by-step showing you where each wire goes is beyond the scope of this article. If you look at the traces on the circuit board you'll see which wire needs to touch which to actuate a button. Hook them up in the right order and make sure your buttons are momentary, normally open. Test everything with a meter and ensure the wires on each button are not conductive to one another when the button is not pressed. If they are, double-check your wiring and soldering on the board. The remote won't work if it thinks one of it's buttons is being held down. Thus far all we've done is replaced the soft rubber buttons with actual buttons and put it in a giant, unattractive box. That's not very useful so you need to "export" some of the wires outside the box for connection to your HA system's relays. I chose to connect those wires right at the buttons for simplicity's sake. First, though, before we complicate things, put it all together and test it. Does the remote work the way it should? If not, figure out why and keep working on it until you get it right. Once the remote is working properly, remove the batteries and get the buttons hooked up to an RJ-45 jack (or other connector). Again, you need only connect to your six core wires - you can hook them together in the right order at your HA's relays and the "program" and "reset" buttons don't need to be controlled via automation. This is what my lid looked like when I finished: 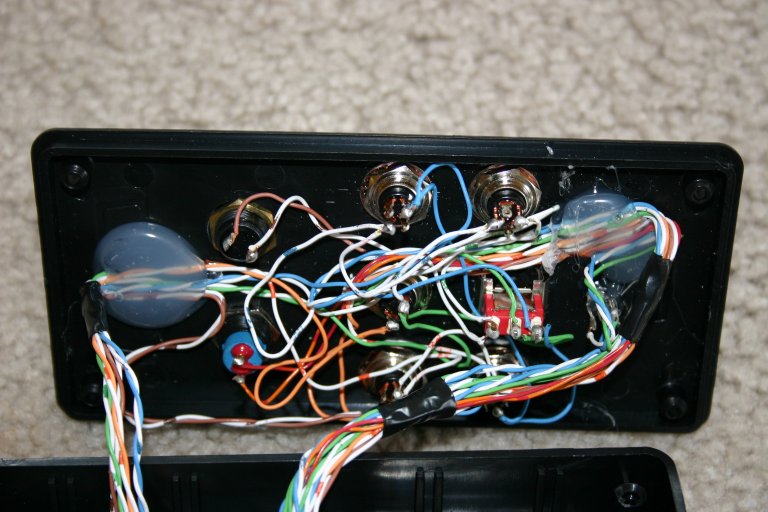
Here is the interior of the project box: 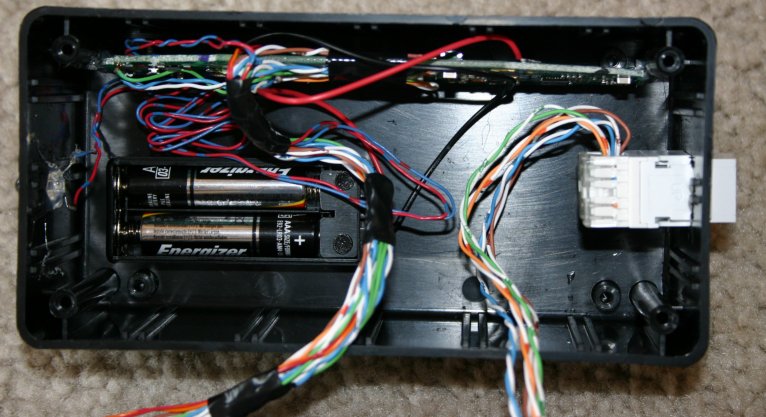
The final product: 
Now that you're done, use the remote as a normal, hand-held remote to program your shades onto various group buttons. Then build a cable to connect the relay port on the box to the relays on your HA system. Plug it in and actuate the relays in the right order (group button first, then up or down) to control your shades. Since the group functions are RF, the remote box can be hidden away in a closet with the rest of your HA gear. | |
Some tips:
Ideas for improvement:
| |